
1. How to mount Farm Butler?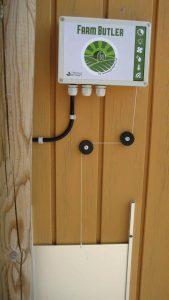
Farm Butler comes with:
- 3m 230V cable that is already connected and ready to connect the mains
- 2m cord that is ready to attach to chicken coop’s door
- 4 screws for mounting the Farm Butler on the wall
- 2 pulleys to guide the cord
Furthermore, it is important that the door that Farm Butler must open / close does NOT weigh more than 1 kg.
2. Placing of FarmButler
The location of Farm Butler is important in relation to several things, such as:
- to sit sheltered by rain, snow and water
- that Farm Butler is least affected by cleaning
- the length and location of the string in relation to the door / limb
- that the string is placed in a way so that it runs freely and avoids dirt and water
Indoor:
There are advantages to having Farm Butler located inside for example in the chicken coop, such as:
- that it is sheltered by wind and weather
- that a longer product life is achieved
Outdoor:
If Farm Butler wanted to be mounted outside, it should therefore be mounted under a small roof so that it is not exposed to direct rain, water or snow. Furthermore, it makes sense to place Farm Butler in shade in relation to the built-in light sensor and temperature sensor.
3. Mounting of Farm Butler
When installing Farm Butler, it is important that at this point, consideration has been given to where door is located in relation to the Farm Butler’s location. Make sure that:
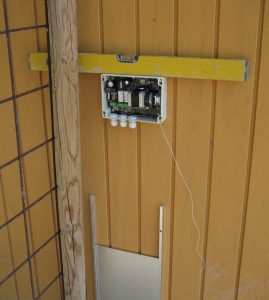
- Farm Butler sitting in level
- The distance to the door is within the length of the string(about 2 meters).
- The door can be pulled up without hitting the Farm Butler
Farm Butler is fitted with the 4 screws included as shown in the picture below.
4. Mounting of string and pulleys
It is very important that the string runs straight out of the box as the cord will otherwise be worn over the string hole in the box.
Furthermore, it is important that the door does not have a weight of more than 1 kg. It is recommended to use the dedicated door that can be found on the webshop.
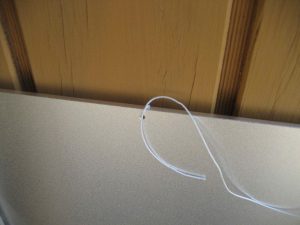
The string is tied with a few knots to the hole at the top of the limb, as seen in the picture below.
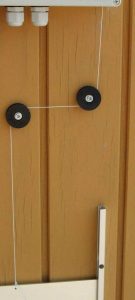
If the cord does not have the ability to run straight out of the box, pulleys should be fitted. The picture below shows how a mounting with 2 pulleys can be performed.
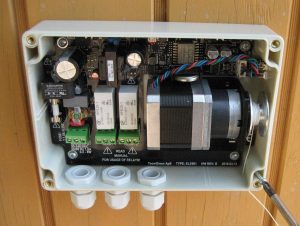
5. Electrical installation
The electric of Farm Butler is described in the section Installation og tilslutning.
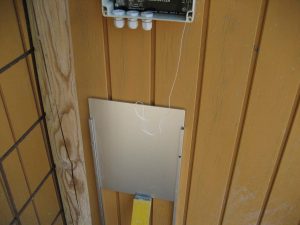
6. Finished installation of Farm Butler
The picture below shows the example of a ready-made Farm Butler.
From here, only the door / limb has to be calibrated so that it can drive the door / limb all the way up and down. Description of the door / limb calibration can be found in the Configuration and Calibration section.
From here you wish to enjoy your new Farm Butler.